


KeyHoleVideo Users Manual
Thank you so much for supporting KeyHole system!
KeyHole is a fastest digital system that enables
broadcasting or viewing of video or audio.
There are 2 parts to KeyHole system: KeyHoleVideo and KeyHoleTV.
In general, KeyHole systems can be used for free of charge. The free version will have slight limitations. Users will be able to broadcast audio/video through KeyHoleVideo for free of charge, however, if time restraint will be placed for broadcast requiring passwords. There will be time limitation for users viewing/listening to broadcasts via KeyHoleTV as well.
Limitations listed above can be removed by…
Please note that Premium Module Key does not have any effect on broad-casted stations. All users will be able to access all the programs that KeyHoleVideo users are broadcasting (without password).
This doucment describes "how to broadcast your video/audio" by KeyHoleVideo
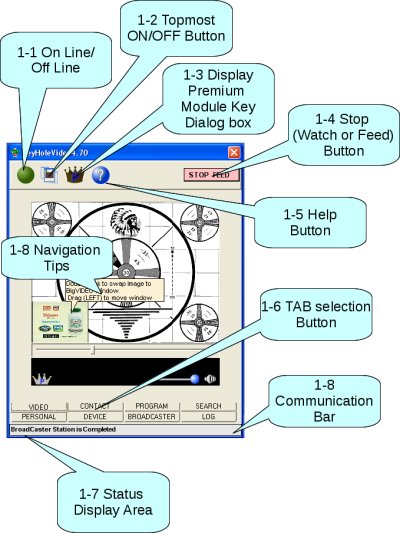
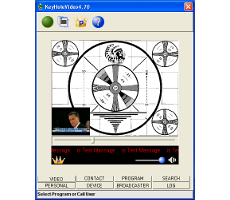
Fig. 1 Common Display Objects
KeyHoleVideo has GUI objects such as buttons, status of the application, switching tabs and input area. This document calls Display Objects in these objects. Common Display objects have a navigation tips. When a mouse pointer stops on the objects, KeyHoleVideo shows their tips.
This is a button for On Line / Off Line . When the the status of the button is On Line . the image of the button becomes green circle. Also, the status of the button is Off Line is red circle. When user clicks Off Line Button, KeyHoleVideo becomes On Line . When user clicks On Line button, KeyHoleVideo becomes Off Line as shown in the Fig.1-1.
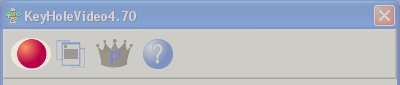
Fig. 1-1 On Line / Off Line Button
When user clicks Off Line button in the several times, the button does not becomes On Line , KeyHoleVideo might have a network problem(s). Also KeyHoleVideo shows the message in the Status Display Area . Possible reasons for this problem could be the followings:
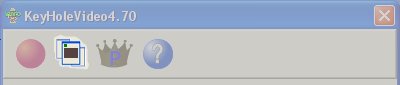
Fig 1-2 Topmost ON/OFF Button
Topmost ON / Topmost OFF button controls ON/OFF Topmost button controls KeyHoleVideo's window hierarchy. When Topmost button is ON, KeyHoleVideo will always b e in the font of other windows on your computer screen.

Fig. 1-3 Display Premium Module Key Dialog Box Button
Premium Module Key is the value which is encrypted by the unique value related with KeyHole user name. Therefore Premium Module Key is unique value on each KeyHole user name. Premium Module Key controls bandwidth on KeyHole system. However Premium Module Key does not control Internet bandwidth such as LAN bandwidth ,the provider bandwidth and country wide bandwidth. This button opens Premium Module Key Dialog Box . The icon of the button is changed, when the status of the Premium Module Key.
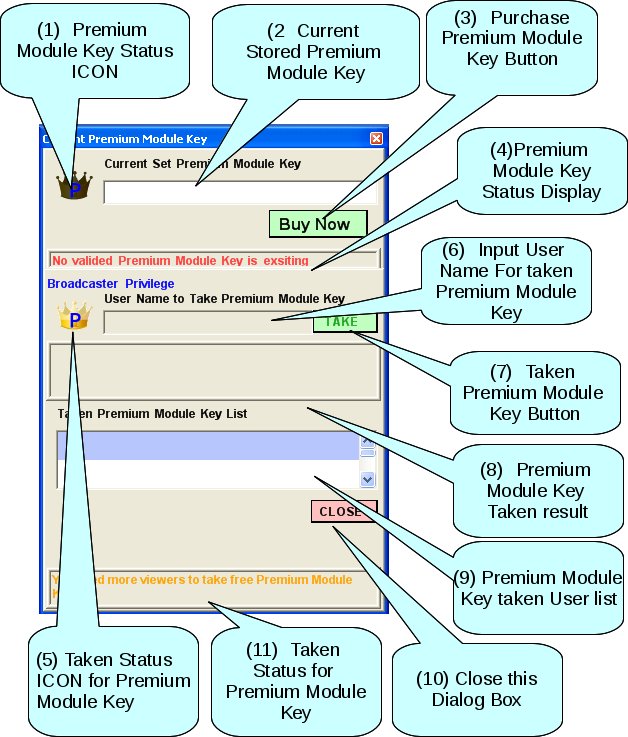
Fig. 1-3-1 Premium Module Key Dialog Box
(No Premium Module Key and Not enough Premium Point)
Premium Module Key Dialog Box shows the following items:
When a user who broadcasts a video/audio program without a password (called distributor in this document.) by KeyHoleVideo and the video/audio program is watched by several amounts of users in the certain period, the distributor has a chance to take a free Premium Module Key.
If a person who has several user names in KeyHoleVideo and each user distributes a video/audio program without a password, each user is an independent distributor.
Taking a free Premium Module Key needs amounts of values. The unit of amounts of numeric values is called Premium Point in this document.
The rule of the Premium Point is the following:
When a distributor stores more than 2500 Premium Points, the distributor is able to take a free Premium Module Key. The distributor can store up to 3000 Premium Points.
When a distributor takes Premium Module Key, distributor has to wait until 25 days to get next Premium Module Key, even if the distributor has enough Premium Points.
The icon might be changed by the status of
Premium Module Key.
Fig. 1-3-1 shows the status of
Premium Module Key is almost expiring.
When
Premium Module Key will expire in about three days, the ICON of
the dialog box will be the following:
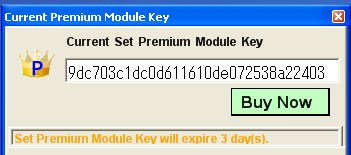
Fig. 1-3-2 Premium Module Key Dialog Box
(Premium Module Key will expire in about 3 days)
This button opens web page where
Premium Module key sales.
The web page is opened with
distributor
name.
This button is available that KeyHoleVideo is
On Line
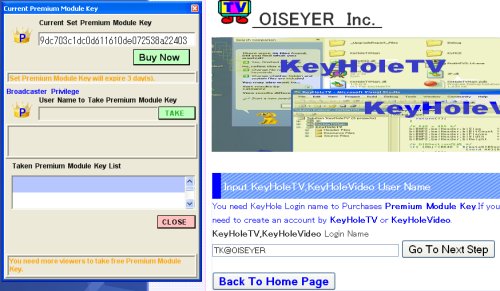
Fig. 1-3-3 Purchase Premium Module Key
The ICON shows the status of
Premium Point
by broadcasting video/audio program by KeyHoleVideo.
The condition of taking free
Premium Module Key the followings:
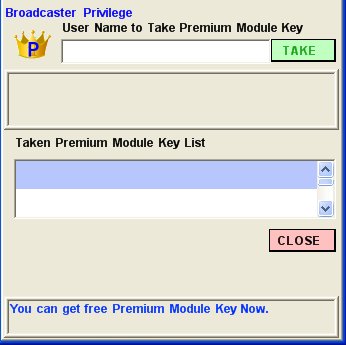
Fig. 1-3-4 Enabled input for User Name
For taken Premium Module Key
When a distributor has enough Premium Point and the distributor spends 25 days after last taken, the Input area is enabled. When a distributor takes free Premium Module Key, the distributor has to input a user name in to this area. the user name must has been registered in the KeyHoleTV or KeyHoleVideo. When the user name has not been registered yet, KeyHoleVideo shows an error message in the Status Display Area and KeyHole system does not take points. When a distributor takes free Premium Module Key, KeyHole system takes 2500 points from Premium Point of the distributor.
This area displays the result of the taking
Premium Module Key.
If the KeyHoleVideo has a network problems during the
taking
Premium Module Key process, the result will be the followings:
This list shows the information about date, user name, the value of
free
Premium Module Key. The list keeps 12 items and when items reach
more than 12, the item is going to be over written.。
This area shows the status of
Premium Point
in about points and remind days.
When a distributor can take the free
Premium Module Key,
the text of the message will show blue color.
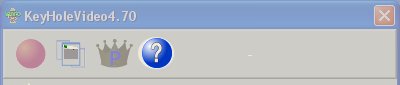
Fig. 1-4 Help Button
This button shows the current Web Page.
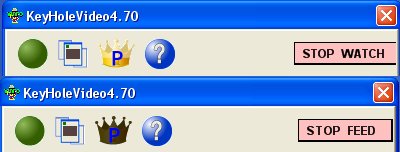
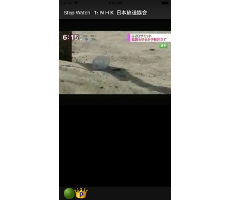
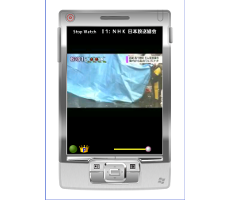
Fig. 1-5 Stop (Watch or Feed) Button
KeyHoleVideo shows several types buttons in the same location. In case of the broadcasting, KeyHoleVideo shows "STOP FEED" button. In case of the watching video/audio program, KeyHoleVideo shows "STOP WATCH" button. The above figure (Fig. 1-6) shows the (Watch or Feed) button.

Fig. 1-6 Tab Selection Button
This button switches a tab page. When the tab page is changed, KeyHoleVideo shows the target tab page.

Fig. 1-7 Status Display Area
This area shows a text message by user's operation or network status.

Fig. 1-8 Communication Bar
This area shows the communication status by a blue block. The blue block is moving left to/from right. When the moving the block, is displayed a long period, it might be some network problem happened.
Fig. 1-8 Navigation Tips
KeyHoleVideo shows a navigation tips, when the mouse pointer stays on enabled Display Objects.
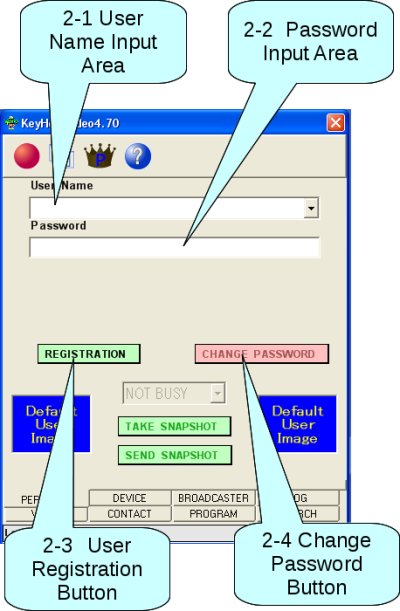
Fig. 2 User Info. Tab
If a distributor broadcasts video/audio program for a long time, the new version of KeyHoleVideo automatically will be registered broadcasters, when the new version of KeyHoleVideo is started. Broadcasters might have Premium Point
KeyHoleVideo can stores 4 users in your PC. However user names which are stored in your PC, might be erased when the new version of KeyHoleVideo is started. This situation comes from dependent upon distributor. Distributor was broadcast video/audio program for a long time, KeyHole administrator had been registered the name of the distributor to the system. Also, the distributor have Premium Points .
Input user name area (
distributor
) in this area.
If the user name has been already registered,
KeyHoleVideo stores the user name and a password in the PC,
when KeyHoleVideo becomes
On Line by the user name.
Input a password in this area.
After you type the password, click
Off Line Button.
Please make sure that
KeyHoleVideo stores the user name and the password in PC.
User name is depended upon
Premium Point
and
Premium Module Key.
KeyHoleVideo is not able to start when
the other KeyHoleVideo is started by the same user name.
Many users need to register a user name and a password by clicking User Registration Button
. If you try several times to click OFF Line Button, KeyHoleVideo does not become On Line , it might be happen the same problem as Possible reasons for this problem .
When user click this button, KeyHoleVideo shows
the registration process screen. The button is enabled when
KeyHoleVideo is
Off Line
.
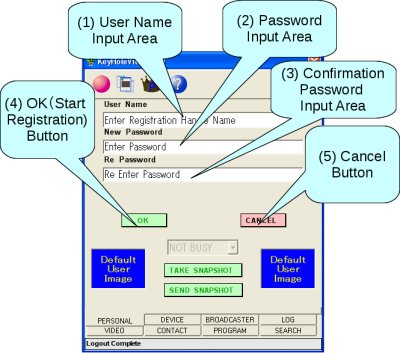
Fig.2-3-1 Registration Process Screen
The registration process screen has
The user registration process needs the following conditions.
When a user name is exist in the (1)User Name Input Area and the String text in the (2)Password Input Area and the string text in the (3)confirmation Password Input Area is the same string text, (5)OK (Start Registration) Button is enabled. When user clicks (5)OK (Start Registration) Button , KeyHoleVideo registers the user.
If the process is completed, KeyHoleVideo stores a user name and a password in your PC. In KeyHole system requires an unique user name. When KeyHole system has been registered the same user name, KeyHoleVideo shows an error message in Status Display Area . Typically reasons of the failing registration process, "Same user name has been registered" and "Network Error, Timeout Log in". If the message means "Network Error, Timeout Log in", the problem is the same as Possible reasons for this problem .
The user name and the password must be up to 64 characters. If the characters of the user name or the password is more than 64 characters, KeyHoleVideo automatically cuts their string. If you don't want to register, click (5)Cancel button.
This button starts the changing password process and
the button is enabled when KeyHoleVideo is
On Line
.
When user clicks the button, KeyHoleVideo shows
the changing password process screen.
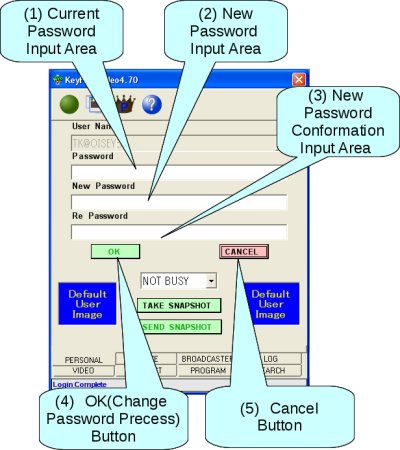
Fig. 2-4-1 Changing Password Process Screen
The changing password process screen has the following items:
When user click (3)OK (Chang Password Process) Button is enabled.
, KeyHoleVideo starts to the changing password process. When the process is completed, KeyHoleVideo stores a new password in your PC. The new password is available when KeyHoleVideo logs in the system by next time.
The password must be up to 64 characters. If the characters of the password is more than 64 characters, KeyHoleVideo automatically cuts their string.
If you don't want to change the password, click (5) Cancel Button.
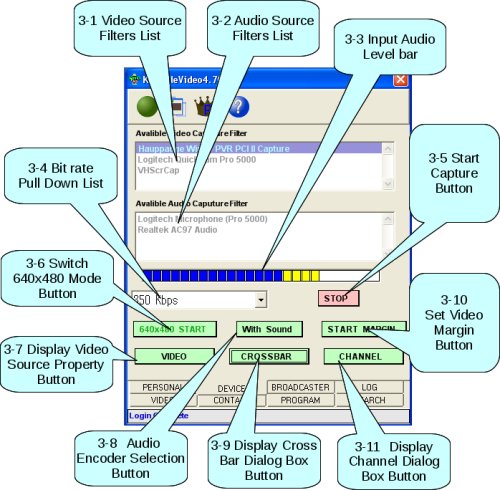
Fig.3 Device Tab
The Device tab controls to capture video and sound. As KeyHoleVideo uses DirectShow interface, KeyHoleVideo can control devices which have DirectShow interface. Many Japanese manufactures don't support DirectShow interface. These capture devices have a hardware encoder system. There are many capture devices to support DirectShow interface in world wide.
If the device does not have full interface of DirectShow, KeyHoleVideo might not capture, even if the device shows in the Video Source Filter List and the enabled START Button.
Please ask hardware vendors, the device has DirectShow interface or not. GraphEdit which is a software form MicroSoft, is one way to understand your capture device has DirectShow Interface.
Device Tab shows the following items:
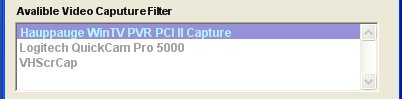
Fig 3-1 Video Source Filters List
The list shows all names (Manufactures decides name) which might be able to capture the video by hardware systems or software systems. You can select one item.
All items in the list might be possible to capture video. The default size of capture the video is 320x240.
Generally a capture filters are a pair of a video and an audio. However, some capture filters show only video source filter in the video source filers list. For instance, Fig. 3 shows not a pair of source filter. KeyHoleVideo automatically will capture the audio source filter by the video source filter, if the video source filter has audio source.
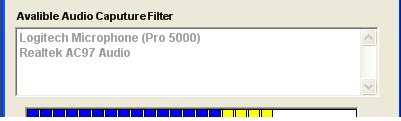
Fig. 3-2 Audio Source Filter List
The list shows all names (Manufactures decides name) which might be able to capture the audio by hardware systems or software systems. You can select one item.
All items in the list might be possible to capture auido.

Fig. 3-3 Input Audio Level Bar
When the selected item in the Audio Source Filters List , is started to capture, KeyHoleVideo might receive the sound data from the capture device. In this time, KeyHoleVideo shows a level of the sound data to this bar. If there are no blocks which are blue, yellow or red color, the capturing audio will be fail.
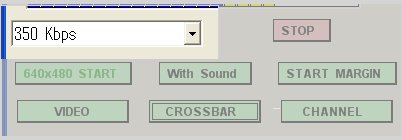
Fig. 3-4 Bit rate Pull Down List
User need to select one of 0 Kbps, 100 Kbps, 200 Kbps and 350 Kbps in the pull down list. A user can select any time, to fit value for distributor's environment. KeyHoleVideo computes the real bit rate by the counting the size of sending packets. KeyHoleVideo tries to keep the bit rate value to send packets. Therefore, the frame of the motion picture, might be drop during the panning video or zooming.
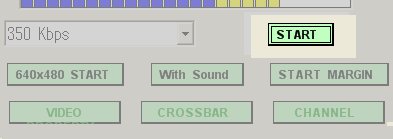
Fig. 3-5 Start Capture Button
When the button is clicked, KeyHoleVideo tries to capture the video in the video source filters list or the audio in the audio source filters list . When the video source filter is selected, KeyHoleVideo enables one of buttons or all buttons such as the display video source property button , the display video cross bar dialog box button or the display channel dialog box button . If all buttons are not enabled, the capturing video might be fail.
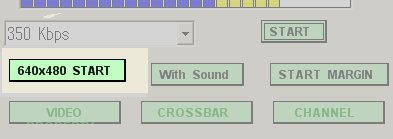
Fig. 3-6 Switch 640x480 Mode Button
When the button is clicked, KeyHoleVideo tries to capture the video by 640x480. This button must be clicked to change the mode before starting the capture.
If user selects 640x480 mode, the size of the picture is bigger than 320x240. It means that the bit rate might be increased. As KeyHoleVideo keeps the bit rate, the frame rate will be drop.
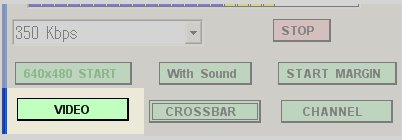
Fig. 3-7 Display Video Source Property Button
When the button is clicked, KeyHoleVideo opens a dialog box for the video property which is provided by the manufacture or the default in DirectShow. This button is enabled when KeyHoleVideo starts to capture the video without fail.
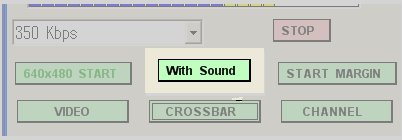
Fig. 3-8 Audio Encoder Selection Button
This button is a selection of the encoders which are "voice" encoder or "audio" encoder. If "voice" encoder is selected, KeyHoleVideo encodes the sound by human voice. The voice encoder can not handle over frequency of the human voice such as mixing sound (voice and music, etc.). The output sound might be noise.
If "audio" encoder is selected, KeyHoleVideo encodes all kinds of sounds.
This button is always available to change the encoder, even if KeyHoleVideo is broadcasting.
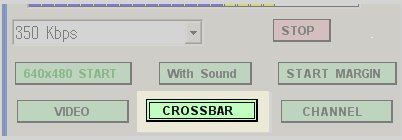
Fig. 3-9 Display Cross Bar Dialog Box Button
When the button is clicked, KeyHoleVideo opens the cross bar dialog box which is provided by the manufacture or the default in DirectShow. This button is enabled when KeyHoleVideo starts to capture the video without fail and the video source filter has a crossbar property.
The video capture source filter has multiple input such as composite input or S-video input, this button might be enabled. The dialog box shows the selection of input sources.
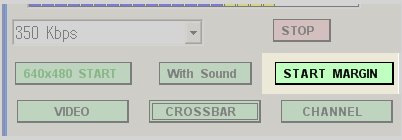
Fig. 3-10 Set Video Margin Button
This button switches to set the video margin or not. When the button is displayed "START MARGIN", there are no video margin. When user wants to set the video margin, user need to click the button.
This feature is the purpose to send motion picture by low bit rate. The video encoder of KeyHoleVideo is the specify for the no motion pixel area during video frames. When the motion picture has only moving pixel(like camera shake, panning or zooming),the encoder of KeyHoleVideo can not create low bit rate. The video margin creates no motion pixel during video frame.
This button is always enabled.

Fig. 3-11 Display Channel Dialog Box Button
When the button is clicked, KeyHoleVideo opens the channel dialog box which is provided by the manufacture or the default in DirectShow. This button is enabled when KeyHoleVideo starts to capture the video without fail and the video source filter has a channel property.

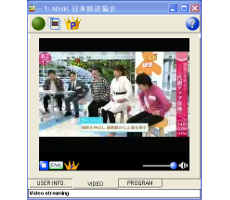
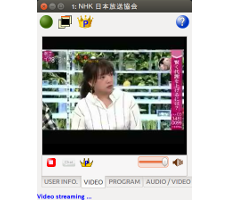
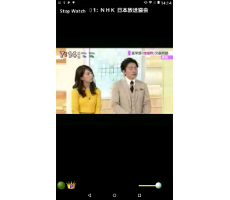
Fig. 4 KeyHoleVideo Video Tab
KeyHoleVideo Video tab shows the following items:
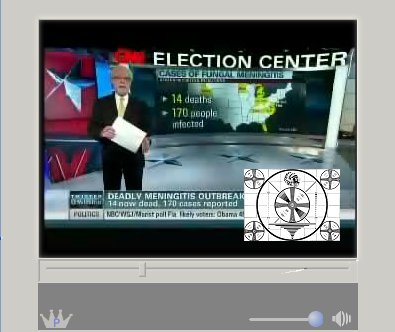
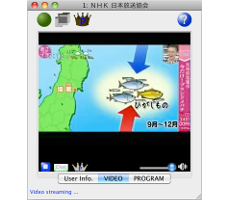
Fig. 4-1 Video Display (Big and Small)
The Video Display has two display area. One is a big display area and the other one is a small display area. When KeyHoleVideo display the videos by receiving data and sending data, KeyHoleVideo shows the sending the motion picture in to the small display area and receiving the motion picture in to the big display area by default.
When the small display area is double clicked, KeyHoleVideo switches the video image from the small display area to the big display area. Fig.4-1 shows the result of the switching video.
When the big display area is single clicked, KeyHoleVideo erases the small display area. When the big display area is single clicked once more,the small display area is shown.(Toggle Switch)
The small display area is available to move by dragging.
When the big display area is double clicked, KeyHoleVideo opens the separated video window. The separated video windows can control the same ratio sizing by key such as ↑ and ↓.
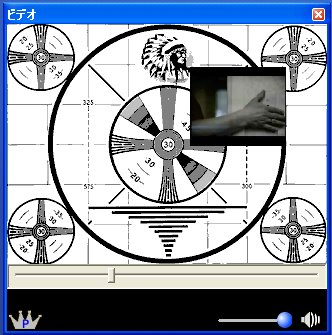
Fig. 4-1-1 Video Window
The separate video window has the following items:
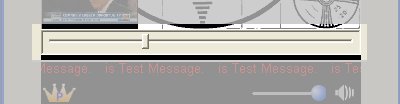
Fig. 4-2 Video Encoder Quality Bar
The bar controls the quality of the video. When the slider is moved to left, the compression rate becomes low, and to right the compression rate becomes high. KeyHoleVideo shows the result of the encoded video in to the small display area by default. And when KeyHoleVideo distributes video, the quality of the video is the same as the result of the video. When the slider is moved to left, the quality becomes high and the bit rate becomes also high. As the bit rate becomes high, the value of the 3-4 Bit Rate Pull Down List
effects to send packets. It means that the frame rate becomes low. When the slider is moved to right, the quality of the video becomes low. However, the bit rate of communication becomes low.
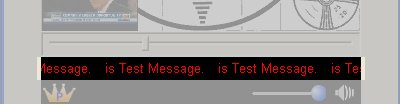
Fig. 4-3 Message Display Bar
Important messages from KeyHoleVideo's distributor or the operation administrator will be displayed in Message Display Bar. Clicking on the message bar will open a designated web page in your default browser. This message may notify users about current status of KeyHole system. Please click on the message bar for more information regarding urgent messages. When the message is written in red color, the message comes from an administrator.

Fig. 4-4 Open Premium Module Key Dialog Box Button
When the button is clicked, KeyHoleVideo opens Premium Module Key Dialog Box . The icon of the button is changed when the status of Premium Module Key is changed.
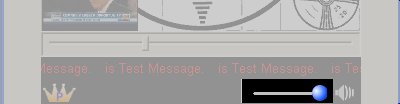
Fig. 4-5 Volume Slider
Volume Slider controls sound intensity. When the tick moves to the right, sound becomes louder and it becomes softer when moved to the left. TAB key can be used to keyboard focus on the Volume Slder. Once Volume Slider has been focused, ← or → keys may be used to adjust volume. The speaker next to the Volume Slider indicates loudness.
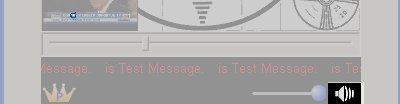
Fig. 4-6 Mute And Volume Display Button
This button can mute KeyHoleTV. When Mute is on, red STOP button will appear. Space key can be used to turn mute on/off. There are four levels of mute.
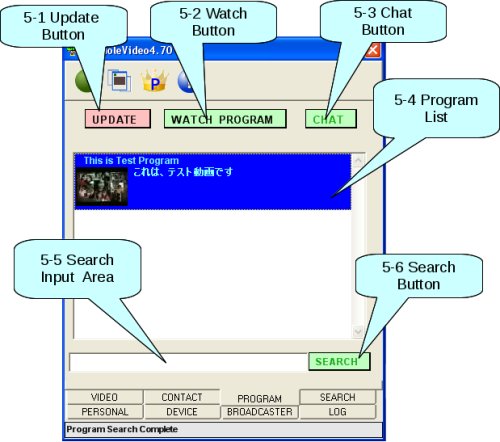
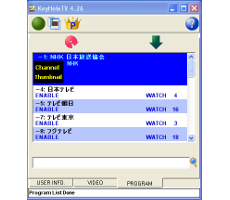
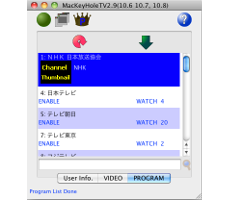
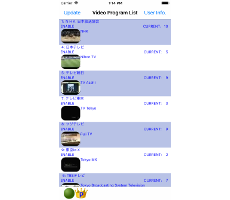
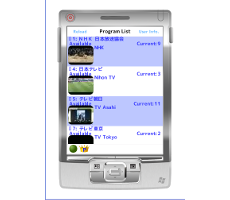
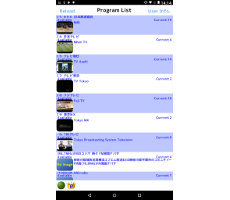
Fig. 5 KeyHoleVideo Program Tab
KeyHoleVideo Program tab shows the following items:
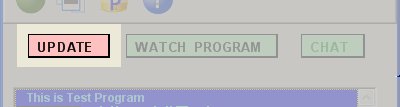
Fig. 5-1 Update Button
When this button is clicked, KeyHoleVideo reload the programs in to the program list. This button is enabled when KeyHoleVideo is On Line and is not watching the video/audio program.

Fig. 5-2 Watch Button
When the button is clicked, KeyHoleVideo starts to receiving a selected video/audio program. After the STOP button is clicked, this button is not enabled.
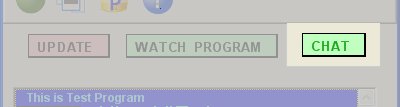
Fig. 5-3 Chat Button
When the button is clicked, KeyHoleVideo opens a chat dialog box to start chat. This button is enabled, when KeyHoleVideo receives streaming video/audio and the distributor allows chat.
The list shows all video/audio programs which are distributed by
KeyHoleVideo users.
When the list shows
blue rectangle
, the
rectangle
points the selected video/audio program.
When the list is clicked, the selected program is changed.
When the list is double clicked, KeyHoleVideo starts
to receive the stream video/audio.
User can change the selection by key such as ↑ or↓.
Also, user can start to watch the selected video/audio program by
Enter key.
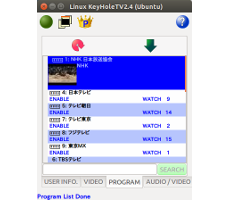
Programs highlighted in red require password set by KeyHoleVideo uses. User will not be able to provide the passwords. Please type in the password in the password bar shown below. Click the CANCEL button to go back to the program list.
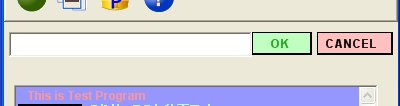
Fig. 5-4 Program with Password

Fig. 5-5 Search Input Area
Users can use this feature to search programs by its title. Start the search by clicking the “Search” button on the right or pressing the Enter key.
The button is enabled, when the text in the
Search Input Area. When the button is clicked,
KeyHoleVideo starts to search the title name by
the longest match method.
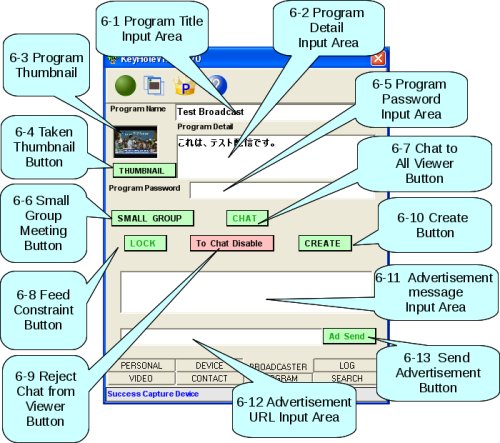
Fig.6 Broadcast Tab
Broadcast tab has the following items:
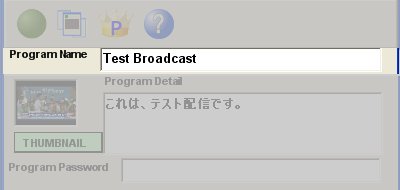
Fig. 6-1 Program Title Input Area
Input the program title. This title is displayed in KeyHoleTV's the program list and KeyHoleVideo's program list. In case of KeyHoleTV, the program list is sorted.
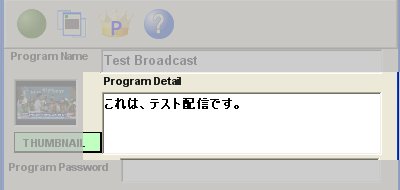
Fig. 6-2 Program Detail Input Area
Input the program detail. The program detail display in KeyHoleTV's the program list and KeyHoleVideo's the program list, when the program is selected.
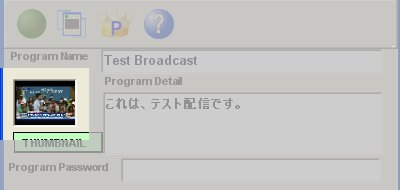
Fig. 6-3 Program Thumbnail
This thumbnail is displayed in the KeyHoleTV's program list and KeyHoleVideo's the program list, when the program is selected. The thumbnail image is taken by the captured image by taken thumbnail button .
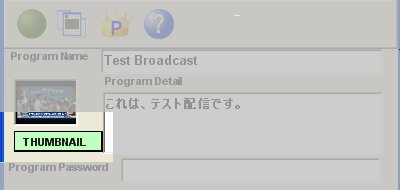
Fig. 6-4 Taken Thumbnail Button
When this button is clicked, KeyHoleVideo takes the captured image. User can take a picture, before the broadcasting.
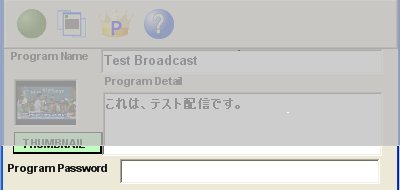
Fig. 6-5 Program Password Input Area
When the test string exists in this area, KeyHoleVideo creates the broadcasting program with the password. If user broadcast the video/audio program with the password and without Prmeium Module Key , KeyHoleVideo will stops to broadcast in about 10 minutes by automatically. When User who have Premium Module Key, KeyHoleVideo broadcasts the video/audio program unlimitedly. However, even if the program is watched many viewers for a long period, the broadcaster will be not take Premium Point. Basically, an administrator does not stop the password protected broadcasting by the content of video/audio.
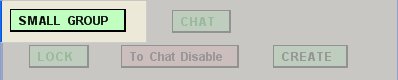
Fig. 6-6 Small Group Meeting Button
When the button is clicked, KeyHoleVideo starts the small group meeting mode. In the small group meeting mode , KeyHoleVideo broadcasts video/audio to many users. However, amounts of users are limited in the small group meeting mode and KeyHoleVideo displays a list of viewers. A user can control feeding video/audio to viewers in the list. Also, the user gets viewer's the captured video/audio in the list.
For cancel the mode, clicks Rest Small Group Meeting Button . The button is enabled when the user clicks Create Button .
During the broadcasting video/audio, the button is not enabled.
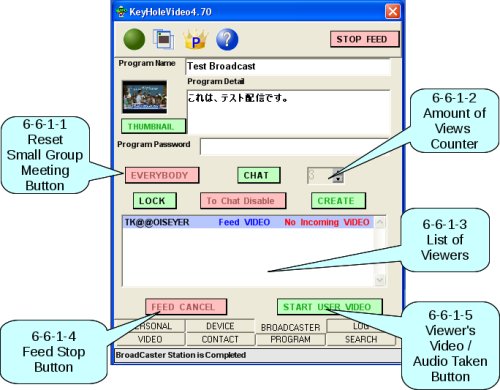
Fig. 6-6-1 Small Group Meeting Mode
In the small group meeting mode, KeyHoleVideo displays the following items;
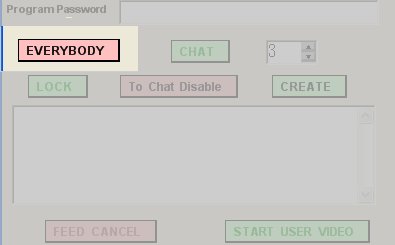
Fig. 6-6-1-1 Reset Small Group Meeting Button
When this button is clicked, KeyHoleVideo resets the small group meeting mode . The button is enabled, before user clicks CREATE Button .
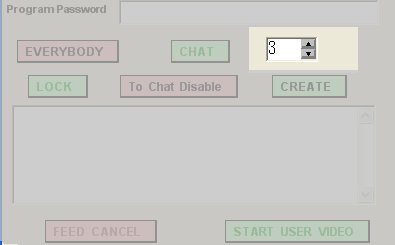
Fig. 6-6-1-2 Amount of Viewers Counter
This counter sets the maximum amount of users to join the meeting. When the small upper arrow is clicked, KeyHoleVideo ups the number of users and the small down arrow is clicked, KeyHoleVideo downs the number of users. The maximum users to join the meeting is up to 50.
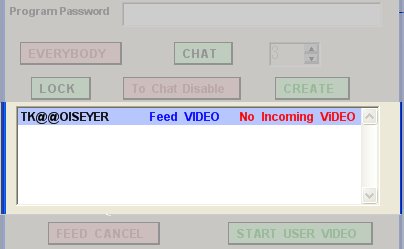
Fig. 6-6-1-3 List of Viewers
The list is shown users who join the small group meeting. The selected user in the list, is controlled by the broadcasters to stop/start the feeding video/audio by Feed Stop Button . Also, the selected user in the list, is taken/no taken the viewer captured video/audio by Viewer's Video/Audio Taken Button. . KeyHoleVideo allows to select a user in the list by the selecting operation.

Fig. 6-6-1-4-1 Feed Stop Button
When this button clicked, KeyHoleVideo stops to feed video the selected user in the list of viewers . If you need to restart the feeding video, you will need to select the user in the list of viewers, and click the restart button.
When the broadcaster stop to feed video, the list of viewers is displayed the item which is "STOP FEED".
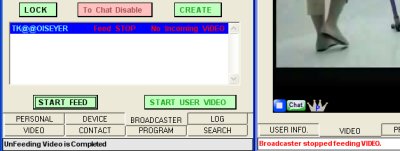
Fig. 6-6-1-4-2 Restart feeding video button and KeyHoleTV
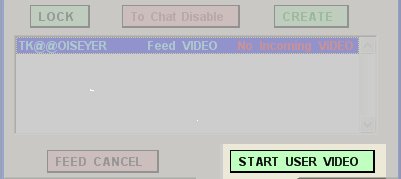
Fig. 6-6-1-5-1 Viewer's Video/Audio Taken Button
When this button is clicked, KeyHoleVideo is taking the selected user's in the list of viewers , video/audio. When the selected user uses KeyHoleVideo, the broadcaster is able to take the user's captured video/audio. If the selected user user uses KeyHoleTV, the operation of the taking video/audio occurs an error. When the broadcaster wants to stop the taking the selected user's video/audio, clicks "Reset".
When broadcaster takes viewer's video/audio, the List of Viewer shows the item which means "START USER VIDEO" video/audio.
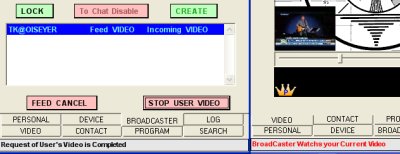
Fig. 6-6-1-5-2 Reset Taking Viewer'Video and KeyHoleVideo
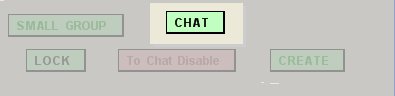
Fig. 6-7 Chat to All Viewers Button
When this button is clicked, KeyHoleVideo opens the chat window. When the broadcaster send the chat message in the chat window, the message will deliver to all viewers, even if KeyHoleVideo is Reject Chat From Viewer Mode . This button is enabled, when the broadcaster clicks Create Button .
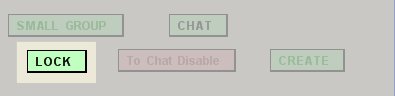
Fig. Feed Constraint Button
When this button is clicked, new users who don't watch this video/audio program now, can not watch the program. When the broadcaster resets, clicks button the shown in Fig. 6-8-2. New users can watch the program.
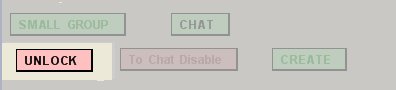
Fig. 6-8-2 Reject Feed Constraint Button.
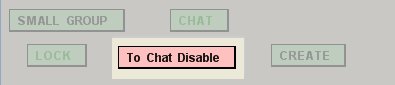
Fig. 6-9-1 Reject Chat From Viewer Button
This button switches "reject chat" or "accept chat". When the button which is displayed "To Chat Disable", is clicked, the broadcaster does not receive a chat message from viewers. When the broadcaster selects "reject chat", Chat Button on KeyHoleTV or Chat Button on KeyHoleVideo.
This button is enabled, before the broadcaster clicks Create Button the broadcasting station.
If the broadcaster wants to reset the "reject chat", the broadcaster will need to close the broadcasting station. If the broadcaster wants to chat, the broadcaster will need to click Chat to All Viewers Button and starts chatting. However, new users who watch after the broadcaster starts chatting, the broadcaster has to send a new message to reach them.
when the broadcaster wants to reset the button, the broadcaster need to click "To Chat Enable Button" as Fig. 6-9-2.
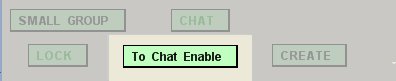
Fig. 6-9-2 To Chat Enable

Fig. 6-10 Create Button
When this button is clicked, KeyHoleVideo starts the broadcasting station. The button is enabled when KeyHoleVideo is On Line and a text in the Program Title Input Area .

Fig. 6-11 Advertisement Message Input Area
Please input an advertisement message in this area. The message will be shown in Message Display Bar in KeyHoleTV or Message Display Bar in KeyHoleVideo.
Sending an advertisement message needs to click Ad Send Button . When the message has been sent, KeyHoleVideo automatically sends the message in the certain period until the closing the broadcasting station.
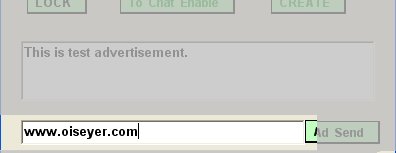
Fig. 6-12 Advertisement URL Input Area
Please input an advertisement URL. When viewer clicks the message display bar, a web browser jumps to the URL, during the advertisement message is shown.
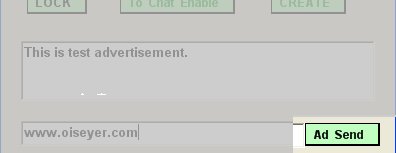
Fig. 6-13 Send Advertisement Button
When this button is clicked, KeyHoleVideo sends the advertisement message and its URL. This button is enabled when the text is existed on the advertisement message input area.
KeyHoleVideo has features to operate by key board.
TAB key is moved the focus to forward the next available display objects.
When user hits "Enter" key, KeyHoleVideo executes the operation
the same as clicking. When the focus on the slider,
← or → key handles the slider. When user clicks a space key,
KeyHoleVideo start to mute on or mute off.
p
0 Introduction
There are 2 parts to KeyHole system: KeyHoleVideo and KeyHoleTV.
In general, KeyHole systems can be used for free of charge. The free version will have slight limitations. Users will be able to broadcast audio/video through KeyHoleVideo for free of charge, however, if time restraint will be placed for broadcast requiring passwords. There will be time limitation for users viewing/listening to broadcasts via KeyHoleTV as well.
Limitations listed above can be removed by…
1. Broadcast your video/audio via KeyHoleTV
without password*.
*This may not apply to programs with no viewers or content (white noise).
2. Purchase Premium Module Key.
Without Premium Module Key, users will automatically be logged out from mobile version of KeyHoleTV.
*This may not apply to programs with no viewers or content (white noise).
2. Purchase Premium Module Key.
Without Premium Module Key, users will automatically be logged out from mobile version of KeyHoleTV.
Please note that Premium Module Key does not have any effect on broad-casted stations. All users will be able to access all the programs that KeyHoleVideo users are broadcasting (without password).
This doucment describes "how to broadcast your video/audio" by KeyHoleVideo
1 Display Objects
Fig. 1 Common Display Objects
KeyHoleVideo has GUI objects such as buttons, status of the application, switching tabs and input area. This document calls Display Objects in these objects. Common Display objects have a navigation tips. When a mouse pointer stops on the objects, KeyHoleVideo shows their tips.
1-1 On Line/Off Line Button
This is a button for On Line / Off Line . When the the status of the button is On Line . the image of the button becomes green circle. Also, the status of the button is Off Line is red circle. When user clicks Off Line Button, KeyHoleVideo becomes On Line . When user clicks On Line button, KeyHoleVideo becomes Off Line as shown in the Fig.1-1.
Fig. 1-1 On Line / Off Line Button
When user clicks Off Line button in the several times, the button does not becomes On Line , KeyHoleVideo might have a network problem(s). Also KeyHoleVideo shows the message in the Status Display Area . Possible reasons for this problem could be the followings:
- Security software may block KeyHoleTV's communication.
- If a user is using a ROUTER, it could also block communication.
- Using IPv6 Internet Protocol version 6 (IPv6).
- A firewall may bock UDP/IP.
- Using KeyHoleTV from a school or a office – may need to consult your IT department.
- (a)Security software blocking communication
- Please check your security software to allow KeyHoleVideo communication. Please check your security software manual for detailed instructions.
- (b)Router blocking communication
- Many routers have a feature to block UDP/IP. KeyHoleVideo uses UDP/IP and its port number is not a fixed value. The port number is provided automatically by the KeyHoleVideo server, therefore, KeyHoleVideo may not work if a user sets a fixed value for port connection. KeyHoleVideo communicates through one port only. Easiest way to fix this problem is to set your router back to its default setting.
- (c) IPv6
- KeyHoleVideo does not support IPv6. Please use IPv4.
- (d) Firewall
- Many OS include software-based firewalls. Please try restarting KeyHoleVideo after modifying the firewall setting by using OS application.
- (e)From School or Office
- KeyHoleVideo uses UDP/IP in the internet protocol. Many schools and offices use routers, which stop UDP/IP. In these environments, KeyHoleVideo may not work. Please ask your network administrator to allow UDP/IP.
1-2 Topmost ON/OFF Button
Fig 1-2 Topmost ON/OFF Button
Topmost ON / Topmost OFF button controls ON/OFF Topmost button controls KeyHoleVideo's window hierarchy. When Topmost button is ON, KeyHoleVideo will always b e in the font of other windows on your computer screen.
1-3 Display Premium Module Key Dialog Box Button
Fig. 1-3 Display Premium Module Key Dialog Box Button
Premium Module Key is the value which is encrypted by the unique value related with KeyHole user name. Therefore Premium Module Key is unique value on each KeyHole user name. Premium Module Key controls bandwidth on KeyHole system. However Premium Module Key does not control Internet bandwidth such as LAN bandwidth ,the provider bandwidth and country wide bandwidth. This button opens Premium Module Key Dialog Box . The icon of the button is changed, when the status of the Premium Module Key.
1-3-1 Premium Module Key Dialog Box
Fig. 1-3-1 Premium Module Key Dialog Box
(No Premium Module Key and Not enough Premium Point)
Premium Module Key Dialog Box shows the following items:
(1)Premium Module Key Status ICON
(2)Current Stored Premium Module Key
(3)Purchase Premium Module Key Button
(4)Premium Module Key Status Display
(5)Taken Status ICON for Premium Module Key
(6)User name for Taken Premium Module Key
(7)Taken Premium Module Key Button
(8)Premium Module Key Taken Result
(9)Premium Module Key Taken List
(10)Close this Dialog Box
(11)Taken Status for Premium Module Key
When a user who broadcasts a video/audio program without a password (called distributor in this document.) by KeyHoleVideo and the video/audio program is watched by several amounts of users in the certain period, the distributor has a chance to take a free Premium Module Key.
If a person who has several user names in KeyHoleVideo and each user distributes a video/audio program without a password, each user is an independent distributor.
Taking a free Premium Module Key needs amounts of values. The unit of amounts of numeric values is called Premium Point in this document.
The rule of the Premium Point is the following:
When the video/audio program which is broad-casted by a
distributor, has a viewer
who has a valid Premium Module Key,
and the viewer watches the program continuously in 10 minutes,
the distributor gets one Premium Point.
If the distributor has a valid Premium Module Key, the distributor gets double Premium Point.
The video/audio program might be stopped by KeyHole administrator in any reasons.
If the distributor has a valid Premium Module Key, the distributor gets double Premium Point.
The video/audio program might be stopped by KeyHole administrator in any reasons.
When a distributor stores more than 2500 Premium Points, the distributor is able to take a free Premium Module Key. The distributor can store up to 3000 Premium Points.
When a distributor takes Premium Module Key, distributor has to wait until 25 days to get next Premium Module Key, even if the distributor has enough Premium Points.
(1)Premium Module Key Status ICON
Fig. 1-3-2 Premium Module Key Dialog Box
(Premium Module Key will expire in about 3 days)
(2)Current Stored Premium Module Key
This display ares shows the current stored Premium Module Key. When user buy Premium Module Key or KeyHoleVideo user takes Premium Module Key to the user, this area shows the value of Premium Module Key.(3)Premium Module Key Purchase Button
Fig. 1-3-3 Purchase Premium Module Key
(4)Premium Module Key Status Display
This area displays the status of the Premium Module Key about remaining days. The text color might be changed by the status of Premium Module Key.(5)Taken Status ICON for Premium Module Key
A
distributor
must have 2500 Premium Point.
A distributor spends 25 days after the last distributor taking Premium Module Key.
If the condition is clear, the area of
"Input User Name for Taken Premium Module Key"
is enabled.
A distributor spends 25 days after the last distributor taking Premium Module Key.
(6)Input User Name For taken Premium Module Key
Fig. 1-3-4 Enabled input for User Name
For taken Premium Module Key
When a distributor has enough Premium Point and the distributor spends 25 days after last taken, the Input area is enabled. When a distributor takes free Premium Module Key, the distributor has to input a user name in to this area. the user name must has been registered in the KeyHoleTV or KeyHoleVideo. When the user name has not been registered yet, KeyHoleVideo shows an error message in the Status Display Area and KeyHole system does not take points. When a distributor takes free Premium Module Key, KeyHole system takes 2500 points from Premium Point of the distributor.
(7)Taken Premium Module Key Button
When the input area has a user name, the button becomes the enabled button. When distributor clicks the button, KeyHoleVideo executes the process of the taking free Premium Module Key.(8)Premium Module key Taken Result
(a) Packets has been arrived at KeyHole server,
the process will be success. However, the message of the result
will show "network error".
(b) Packets does not have arrived at KeyHole server,
the process will be failed. Also the message of the result
will show "network error"
After the distributor becomes
On Line
, KeyHoleVideo shows remind
Premium Points.
(9)Premium Module Key Taken User List
(10)Close Button
This dialog box is closed by this button.(11)Taken Status for Premium Module Key
1-4 Help Button
Fig. 1-4 Help Button
This button shows the current Web Page.
1-5 Stop (Watch or Feed) Button
Fig. 1-5 Stop (Watch or Feed) Button
KeyHoleVideo shows several types buttons in the same location. In case of the broadcasting, KeyHoleVideo shows "STOP FEED" button. In case of the watching video/audio program, KeyHoleVideo shows "STOP WATCH" button. The above figure (Fig. 1-6) shows the (Watch or Feed) button.
1-6 Tab Selection Button
Fig. 1-6 Tab Selection Button
This button switches a tab page. When the tab page is changed, KeyHoleVideo shows the target tab page.
1-7 Status Display Area
Fig. 1-7 Status Display Area
This area shows a text message by user's operation or network status.
1-8 Communication Bar
Fig. 1-8 Communication Bar
This area shows the communication status by a blue block. The blue block is moving left to/from right. When the moving the block, is displayed a long period, it might be some network problem happened.
1-8 Navigation Tips
Fig. 1-8 Navigation Tips
KeyHoleVideo shows a navigation tips, when the mouse pointer stays on enabled Display Objects.
2 User Info. Tab
Fig. 2 User Info. Tab
If a distributor broadcasts video/audio program for a long time, the new version of KeyHoleVideo automatically will be registered broadcasters, when the new version of KeyHoleVideo is started. Broadcasters might have Premium Point
KeyHoleVideo can stores 4 users in your PC. However user names which are stored in your PC, might be erased when the new version of KeyHoleVideo is started. This situation comes from dependent upon distributor. Distributor was broadcast video/audio program for a long time, KeyHole administrator had been registered the name of the distributor to the system. Also, the distributor have Premium Points .
2-1 User Name Input Area
2-2 Password Input Area
Many users need to register a user name and a password by clicking User Registration Button
. If you try several times to click OFF Line Button, KeyHoleVideo does not become On Line , it might be happen the same problem as Possible reasons for this problem .
2-3 User Registration Button
2-3-1 Registration Process Screen
Fig.2-3-1 Registration Process Screen
The registration process screen has
(1)User Name Input Area
(2)Password Input Area
(3)Confirmation Password Input Area
(4)OK(Start Registration) Button
(5)Cancel Button
.(2)Password Input Area
(3)Confirmation Password Input Area
(4)OK(Start Registration) Button
(5)Cancel Button
The user registration process needs the following conditions.
When a user name is exist in the (1)User Name Input Area and the String text in the (2)Password Input Area and the string text in the (3)confirmation Password Input Area is the same string text, (5)OK (Start Registration) Button is enabled. When user clicks (5)OK (Start Registration) Button , KeyHoleVideo registers the user.
If the process is completed, KeyHoleVideo stores a user name and a password in your PC. In KeyHole system requires an unique user name. When KeyHole system has been registered the same user name, KeyHoleVideo shows an error message in Status Display Area . Typically reasons of the failing registration process, "Same user name has been registered" and "Network Error, Timeout Log in". If the message means "Network Error, Timeout Log in", the problem is the same as Possible reasons for this problem .
The user name and the password must be up to 64 characters. If the characters of the user name or the password is more than 64 characters, KeyHoleVideo automatically cuts their string. If you don't want to register, click (5)Cancel button.
2-4 Change Password Button
2-4-1 Changing Password Process
Fig. 2-4-1 Changing Password Process Screen
The changing password process screen has the following items:
(1)Current Password Input Area
(2)New Password Input Area
(3)New Password Confirmation Input Area
(4)OK(Chang Password Process)Button (5)Cancel Button
The changing password process requires the followings:
(2)New Password Input Area
(3)New Password Confirmation Input Area
(4)OK(Chang Password Process)Button (5)Cancel Button
The current stored password is the same as a text string in
(1)Current Password Input Area. And a text string
in (2)Input New Password Area is the same as a text string in
(3)New Password Confirmation Area.
When the requirement is the completed,
(3)OK (Chang Password Process) Button is enabled.When user click (3)OK (Chang Password Process) Button is enabled.
, KeyHoleVideo starts to the changing password process. When the process is completed, KeyHoleVideo stores a new password in your PC. The new password is available when KeyHoleVideo logs in the system by next time.
The password must be up to 64 characters. If the characters of the password is more than 64 characters, KeyHoleVideo automatically cuts their string.
If you don't want to change the password, click (5) Cancel Button.
3 Device Tab
Fig.3 Device Tab
The Device tab controls to capture video and sound. As KeyHoleVideo uses DirectShow interface, KeyHoleVideo can control devices which have DirectShow interface. Many Japanese manufactures don't support DirectShow interface. These capture devices have a hardware encoder system. There are many capture devices to support DirectShow interface in world wide.
If the device does not have full interface of DirectShow, KeyHoleVideo might not capture, even if the device shows in the Video Source Filter List and the enabled START Button.
Please ask hardware vendors, the device has DirectShow interface or not. GraphEdit which is a software form MicroSoft, is one way to understand your capture device has DirectShow Interface.
Device Tab shows the following items:
3-1 Video Source Filters List
3-2 Audio Source Filters List
3-3 Input Audio Level Bar
3-4 Bit rate Pull down List
3-5 Start Capture Button
3-6 Switch 640x480 Mode Button
3-7 Display Video Source Property Button
3-8 Audio Encoder Selection Button
3-9 Display Cross Bar Dialog Box Button
3-10 Set Video Margin Button
3-11 Display Channel Dialog Box Button
3-1 Video Source Filter List
Fig 3-1 Video Source Filters List
The list shows all names (Manufactures decides name) which might be able to capture the video by hardware systems or software systems. You can select one item.
All items in the list might be possible to capture video. The default size of capture the video is 320x240.
Generally a capture filters are a pair of a video and an audio. However, some capture filters show only video source filter in the video source filers list. For instance, Fig. 3 shows not a pair of source filter. KeyHoleVideo automatically will capture the audio source filter by the video source filter, if the video source filter has audio source.
3-2 Audio Source Filters List
Fig. 3-2 Audio Source Filter List
The list shows all names (Manufactures decides name) which might be able to capture the audio by hardware systems or software systems. You can select one item.
All items in the list might be possible to capture auido.
3-3 Input Audio Level Bar
Fig. 3-3 Input Audio Level Bar
When the selected item in the Audio Source Filters List , is started to capture, KeyHoleVideo might receive the sound data from the capture device. In this time, KeyHoleVideo shows a level of the sound data to this bar. If there are no blocks which are blue, yellow or red color, the capturing audio will be fail.
3-4 Bit rate Pull Down List
Fig. 3-4 Bit rate Pull Down List
User need to select one of 0 Kbps, 100 Kbps, 200 Kbps and 350 Kbps in the pull down list. A user can select any time, to fit value for distributor's environment. KeyHoleVideo computes the real bit rate by the counting the size of sending packets. KeyHoleVideo tries to keep the bit rate value to send packets. Therefore, the frame of the motion picture, might be drop during the panning video or zooming.
3-5 Start Capture Button
Fig. 3-5 Start Capture Button
When the button is clicked, KeyHoleVideo tries to capture the video in the video source filters list or the audio in the audio source filters list . When the video source filter is selected, KeyHoleVideo enables one of buttons or all buttons such as the display video source property button , the display video cross bar dialog box button or the display channel dialog box button . If all buttons are not enabled, the capturing video might be fail.
3-6 Switch 640x480 Mode Button
Fig. 3-6 Switch 640x480 Mode Button
When the button is clicked, KeyHoleVideo tries to capture the video by 640x480. This button must be clicked to change the mode before starting the capture.
If user selects 640x480 mode, the size of the picture is bigger than 320x240. It means that the bit rate might be increased. As KeyHoleVideo keeps the bit rate, the frame rate will be drop.
3-7 Display Video Source Property Button
Fig. 3-7 Display Video Source Property Button
When the button is clicked, KeyHoleVideo opens a dialog box for the video property which is provided by the manufacture or the default in DirectShow. This button is enabled when KeyHoleVideo starts to capture the video without fail.
3-8 Audio Encoder Selection Button
Fig. 3-8 Audio Encoder Selection Button
This button is a selection of the encoders which are "voice" encoder or "audio" encoder. If "voice" encoder is selected, KeyHoleVideo encodes the sound by human voice. The voice encoder can not handle over frequency of the human voice such as mixing sound (voice and music, etc.). The output sound might be noise.
If "audio" encoder is selected, KeyHoleVideo encodes all kinds of sounds.
This button is always available to change the encoder, even if KeyHoleVideo is broadcasting.
3-9 Display Cross Bar Dialog Box Button
Fig. 3-9 Display Cross Bar Dialog Box Button
When the button is clicked, KeyHoleVideo opens the cross bar dialog box which is provided by the manufacture or the default in DirectShow. This button is enabled when KeyHoleVideo starts to capture the video without fail and the video source filter has a crossbar property.
The video capture source filter has multiple input such as composite input or S-video input, this button might be enabled. The dialog box shows the selection of input sources.
3-10 Set Video Margin Button
Fig. 3-10 Set Video Margin Button
This button switches to set the video margin or not. When the button is displayed "START MARGIN", there are no video margin. When user wants to set the video margin, user need to click the button.
This feature is the purpose to send motion picture by low bit rate. The video encoder of KeyHoleVideo is the specify for the no motion pixel area during video frames. When the motion picture has only moving pixel(like camera shake, panning or zooming),the encoder of KeyHoleVideo can not create low bit rate. The video margin creates no motion pixel during video frame.
This button is always enabled.
3-11 Display Channel Dialog Box Button
Fig. 3-11 Display Channel Dialog Box Button
When the button is clicked, KeyHoleVideo opens the channel dialog box which is provided by the manufacture or the default in DirectShow. This button is enabled when KeyHoleVideo starts to capture the video without fail and the video source filter has a channel property.
4 KeyHoleVideo Video Tab
Fig. 4 KeyHoleVideo Video Tab
KeyHoleVideo Video tab shows the following items:
4-1 Video Display(Big and Small)
4-2 Video Encoder Quality Bar
4-3 Message Display Bar
4-4 Open Premium Module Key Dialog Box Button
4-5 Volume Slider、
4-6 Mute And Volume Dispplay Button
4-2 Video Encoder Quality Bar
4-3 Message Display Bar
4-4 Open Premium Module Key Dialog Box Button
4-5 Volume Slider、
4-6 Mute And Volume Dispplay Button
4-1 Video Display (Big and Small)
Fig. 4-1 Video Display (Big and Small)
The Video Display has two display area. One is a big display area and the other one is a small display area. When KeyHoleVideo display the videos by receiving data and sending data, KeyHoleVideo shows the sending the motion picture in to the small display area and receiving the motion picture in to the big display area by default.
When the small display area is double clicked, KeyHoleVideo switches the video image from the small display area to the big display area. Fig.4-1 shows the result of the switching video.
When the big display area is single clicked, KeyHoleVideo erases the small display area. When the big display area is single clicked once more,the small display area is shown.(Toggle Switch)
The small display area is available to move by dragging.
When the big display area is double clicked, KeyHoleVideo opens the separated video window. The separated video windows can control the same ratio sizing by key such as ↑ and ↓.
4-1-1 Video Window
Fig. 4-1-1 Video Window
The separate video window has the following items:
Video Display (Small and Big)
Video Encoder Quality Bar
Message Display Bar
Open Premium Module Key Dialog Box Button
Volume Silder
Mute And Volume Dispplay Button
The video display has the same feature as
4-1 Video Display
.
However when the big display area is double clicked,
KeyHoleVideo handles two single clicks.
Video Encoder Quality Bar
Message Display Bar
Open Premium Module Key Dialog Box Button
Volume Silder
Mute And Volume Dispplay Button
4-2 Video Encoder Quality Bar
Fig. 4-2 Video Encoder Quality Bar
The bar controls the quality of the video. When the slider is moved to left, the compression rate becomes low, and to right the compression rate becomes high. KeyHoleVideo shows the result of the encoded video in to the small display area by default. And when KeyHoleVideo distributes video, the quality of the video is the same as the result of the video. When the slider is moved to left, the quality becomes high and the bit rate becomes also high. As the bit rate becomes high, the value of the 3-4 Bit Rate Pull Down List
effects to send packets. It means that the frame rate becomes low. When the slider is moved to right, the quality of the video becomes low. However, the bit rate of communication becomes low.
4-3 Message Display Bar
Fig. 4-3 Message Display Bar
Important messages from KeyHoleVideo's distributor or the operation administrator will be displayed in Message Display Bar. Clicking on the message bar will open a designated web page in your default browser. This message may notify users about current status of KeyHole system. Please click on the message bar for more information regarding urgent messages. When the message is written in red color, the message comes from an administrator.
4-4 Open Premium Module Key Dialog Box Button
Fig. 4-4 Open Premium Module Key Dialog Box Button
When the button is clicked, KeyHoleVideo opens Premium Module Key Dialog Box . The icon of the button is changed when the status of Premium Module Key is changed.
4-5 Volume Slider
Fig. 4-5 Volume Slider
Volume Slider controls sound intensity. When the tick moves to the right, sound becomes louder and it becomes softer when moved to the left. TAB key can be used to keyboard focus on the Volume Slder. Once Volume Slider has been focused, ← or → keys may be used to adjust volume. The speaker next to the Volume Slider indicates loudness.
4-6 Mute And Volume Display Button
Fig. 4-6 Mute And Volume Display Button
This button can mute KeyHoleTV. When Mute is on, red STOP button will appear. Space key can be used to turn mute on/off. There are four levels of mute.
5 KeyHoleVideo Program Tab
Fig. 5 KeyHoleVideo Program Tab
KeyHoleVideo Program tab shows the following items:
5-1 Update Button
5-2 Watch Button
5-3 Chat Button
5-4 Program List
5-5 Search Input Area
5-5 Search Button
5-2 Watch Button
5-3 Chat Button
5-4 Program List
5-5 Search Input Area
5-5 Search Button
5-1 Update Button
Fig. 5-1 Update Button
When this button is clicked, KeyHoleVideo reload the programs in to the program list. This button is enabled when KeyHoleVideo is On Line and is not watching the video/audio program.
5-2 Watch Button
Fig. 5-2 Watch Button
When the button is clicked, KeyHoleVideo starts to receiving a selected video/audio program. After the STOP button is clicked, this button is not enabled.
5-3 Chat Button
Fig. 5-3 Chat Button
When the button is clicked, KeyHoleVideo opens a chat dialog box to start chat. This button is enabled, when KeyHoleVideo receives streaming video/audio and the distributor allows chat.
5-4 Program List
Programs highlighted in red require password set by KeyHoleVideo uses. User will not be able to provide the passwords. Please type in the password in the password bar shown below. Click the CANCEL button to go back to the program list.
Fig. 5-4 Program with Password
5-5 Search Input Area
Fig. 5-5 Search Input Area
Users can use this feature to search programs by its title. Start the search by clicking the “Search” button on the right or pressing the Enter key.
5-5 Search Button
6 Broadcast Tab
Fig.6 Broadcast Tab
Broadcast tab has the following items:
6-1 Program Title Input Area
6-2 Program Detail Input Area
6-3 Program Thumbnail
6-4 Take Thumbnail Button
6-5 Program Password Input Area
6-6 Small Group Meeting Button
6-7 Chat to All Viewer Button
6-8 Feed Constraint Button
6-9 Reject Chat from Viewer Button
6-10 Create Button
6-11 Advertisement Message Input Area
6-12 Advertisement URL Input Area
6-13 Send Advertisement Button
6-1 Program Title Input Area
Fig. 6-1 Program Title Input Area
Input the program title. This title is displayed in KeyHoleTV's the program list and KeyHoleVideo's program list. In case of KeyHoleTV, the program list is sorted.
6-2 Program Detail Input Area
Fig. 6-2 Program Detail Input Area
Input the program detail. The program detail display in KeyHoleTV's the program list and KeyHoleVideo's the program list, when the program is selected.
6-3 Program Thumbnail
Fig. 6-3 Program Thumbnail
This thumbnail is displayed in the KeyHoleTV's program list and KeyHoleVideo's the program list, when the program is selected. The thumbnail image is taken by the captured image by taken thumbnail button .
6-4 Taken thumbnail Button
Fig. 6-4 Taken Thumbnail Button
When this button is clicked, KeyHoleVideo takes the captured image. User can take a picture, before the broadcasting.
6-5 Program Password Input Area
Fig. 6-5 Program Password Input Area
When the test string exists in this area, KeyHoleVideo creates the broadcasting program with the password. If user broadcast the video/audio program with the password and without Prmeium Module Key , KeyHoleVideo will stops to broadcast in about 10 minutes by automatically. When User who have Premium Module Key, KeyHoleVideo broadcasts the video/audio program unlimitedly. However, even if the program is watched many viewers for a long period, the broadcaster will be not take Premium Point. Basically, an administrator does not stop the password protected broadcasting by the content of video/audio.
6-6 Small Group Meeting Button
Fig. 6-6 Small Group Meeting Button
When the button is clicked, KeyHoleVideo starts the small group meeting mode. In the small group meeting mode , KeyHoleVideo broadcasts video/audio to many users. However, amounts of users are limited in the small group meeting mode and KeyHoleVideo displays a list of viewers. A user can control feeding video/audio to viewers in the list. Also, the user gets viewer's the captured video/audio in the list.
For cancel the mode, clicks Rest Small Group Meeting Button . The button is enabled when the user clicks Create Button .
During the broadcasting video/audio, the button is not enabled.
6-6-1 Small Group Meeting Mode
Fig. 6-6-1 Small Group Meeting Mode
In the small group meeting mode, KeyHoleVideo displays the following items;
6-6-1-1 Rest Small Group Meeting Button
6-6-1-2 Amount of Viewers Counter
6-6-1-3 List of Viewers
6-6-1-4 Feed Stop Button
6-6-1-5 Viewers's Video/Audio Taken Button
KeyHoleVideo stops/starts to feed the video to
the selected user, and gets video/audio from the selected
user in the list.
6-6-1-2 Amount of Viewers Counter
6-6-1-3 List of Viewers
6-6-1-4 Feed Stop Button
6-6-1-5 Viewers's Video/Audio Taken Button
6-6-1-1 Reset Small Group Meeting Button
Fig. 6-6-1-1 Reset Small Group Meeting Button
When this button is clicked, KeyHoleVideo resets the small group meeting mode . The button is enabled, before user clicks CREATE Button .
6-6-1-2 Amount of Viewers Counter
Fig. 6-6-1-2 Amount of Viewers Counter
This counter sets the maximum amount of users to join the meeting. When the small upper arrow is clicked, KeyHoleVideo ups the number of users and the small down arrow is clicked, KeyHoleVideo downs the number of users. The maximum users to join the meeting is up to 50.
6-6-1-3 List of Viewers
Fig. 6-6-1-3 List of Viewers
The list is shown users who join the small group meeting. The selected user in the list, is controlled by the broadcasters to stop/start the feeding video/audio by Feed Stop Button . Also, the selected user in the list, is taken/no taken the viewer captured video/audio by Viewer's Video/Audio Taken Button. . KeyHoleVideo allows to select a user in the list by the selecting operation.
6-6-1-4 Feed Stop Button
Fig. 6-6-1-4-1 Feed Stop Button
When this button clicked, KeyHoleVideo stops to feed video the selected user in the list of viewers . If you need to restart the feeding video, you will need to select the user in the list of viewers, and click the restart button.
When the broadcaster stop to feed video, the list of viewers is displayed the item which is "STOP FEED".
Fig. 6-6-1-4-2 Restart feeding video button and KeyHoleTV
6-6-1-5 Viewer's Video/Audio Taken Button
Fig. 6-6-1-5-1 Viewer's Video/Audio Taken Button
When this button is clicked, KeyHoleVideo is taking the selected user's in the list of viewers , video/audio. When the selected user uses KeyHoleVideo, the broadcaster is able to take the user's captured video/audio. If the selected user user uses KeyHoleTV, the operation of the taking video/audio occurs an error. When the broadcaster wants to stop the taking the selected user's video/audio, clicks "Reset".
When broadcaster takes viewer's video/audio, the List of Viewer shows the item which means "START USER VIDEO" video/audio.
Fig. 6-6-1-5-2 Reset Taking Viewer'Video and KeyHoleVideo
6-7 Chat to All Viewers Button
Fig. 6-7 Chat to All Viewers Button
When this button is clicked, KeyHoleVideo opens the chat window. When the broadcaster send the chat message in the chat window, the message will deliver to all viewers, even if KeyHoleVideo is Reject Chat From Viewer Mode . This button is enabled, when the broadcaster clicks Create Button .
6-8 Feed Constraint Button
Fig. Feed Constraint Button
When this button is clicked, new users who don't watch this video/audio program now, can not watch the program. When the broadcaster resets, clicks button the shown in Fig. 6-8-2. New users can watch the program.
Fig. 6-8-2 Reject Feed Constraint Button.
6-9 Reject Chat From Viewer Button
Fig. 6-9-1 Reject Chat From Viewer Button
This button switches "reject chat" or "accept chat". When the button which is displayed "To Chat Disable", is clicked, the broadcaster does not receive a chat message from viewers. When the broadcaster selects "reject chat", Chat Button on KeyHoleTV or Chat Button on KeyHoleVideo.
This button is enabled, before the broadcaster clicks Create Button the broadcasting station.
If the broadcaster wants to reset the "reject chat", the broadcaster will need to close the broadcasting station. If the broadcaster wants to chat, the broadcaster will need to click Chat to All Viewers Button and starts chatting. However, new users who watch after the broadcaster starts chatting, the broadcaster has to send a new message to reach them.
when the broadcaster wants to reset the button, the broadcaster need to click "To Chat Enable Button" as Fig. 6-9-2.
Fig. 6-9-2 To Chat Enable
6-10 Create Button
Fig. 6-10 Create Button
When this button is clicked, KeyHoleVideo starts the broadcasting station. The button is enabled when KeyHoleVideo is On Line and a text in the Program Title Input Area .
6-11 Advertisement Message Input Area
Fig. 6-11 Advertisement Message Input Area
Please input an advertisement message in this area. The message will be shown in Message Display Bar in KeyHoleTV or Message Display Bar in KeyHoleVideo.
Sending an advertisement message needs to click Ad Send Button . When the message has been sent, KeyHoleVideo automatically sends the message in the certain period until the closing the broadcasting station.
6-12 Advertisement URL Input Area
Fig. 6-12 Advertisement URL Input Area
Please input an advertisement URL. When viewer clicks the message display bar, a web browser jumps to the URL, during the advertisement message is shown.
6-13 Send Advertisement Button
Fig. 6-13 Send Advertisement Button
When this button is clicked, KeyHoleVideo sends the advertisement message and its URL. This button is enabled when the text is existed on the advertisement message input area.
